Sunday, June 28, 2009

Summer top finished

BWOF 06-2008-109


A better result with a BWOF pattern. Though it might not seem like it from my last posts, I still love BWOF a lot, only they seem better suited to make patterns for those with a bit more experience. For this blouse I took size 40 and tapered a bit wider at the hips. Because of the gathering of the front to the yoke and in the side seams, I trusted not to need a FBA, and it's fine without. Too much gathering at my narrow shoulders isn't good either, but this is just right.

For me a perfect summer blouse, which I can wear in the coming week. High temperatures are predicted, and already today it's warm with high humidity. Not the kind of weather I prefer.

Saturday, June 20, 2009

How NOT to motivate a starting seamstress

The last two issues of BWOF (June and July) were heartily welcomed by my 15 year old daughter. The easy summer styles did appeal to her. She is a beginner and likes to sew for herself from time to time. She has enough experience now to trace patterns on her own, cut fabric, mark the pieces and sew a basic style without too much help.

The June top with too many layers that I finished for her was the first setback. It has 1.5 dot in BWOF and didn't look too complicated. Today another BWOF setback. In the July issue that arrived yesterday, the cozy was immediately catching attention. I'm wearing mine regularly, and she already indicated she wanted one too.

image

A one dot pattern, seems easy. Disappointment. She made the pattern by the instructions in the magazine (no tracing). The sleeve opening is only a slit in the fabric! Easy? Not. Did you ever try to make a round sleeve in a slit in the fabric. Difficult to make that neat. I had to unpick the serged seam (of course I did that, to make her motivation not worse). After inserting the sleeves and seaming (by my daughter) the whole fit is strange. Sleeves are set too low, too wide, definitely not flattering. A wadder.

It could have been made so much easier with a seam for shoulder and side. Above BWOF instruction, my idea below (if only I had thought of that in the first place). Sew the shoulder/neckline seam first, sew the sleeve (in the flat), sew sleeve and side seam in one pass. This at least makes construction easier, if not the fit.

image

Of course we all have those disappointments from time to time, but two times in a row doesn't make my daughter enthousiastic for sewing. She's going to buy a cozy.

Thank you all for your kind words on my last post. I did start afresh in google reader. Apparently the heavy work load also has its effect on my way at looking at blogging, reading blogs and sewing in general. I'm told to try to take it easy for a while with work. It's been crazy for too long, and I'm feeling the fysical effects.

On the blogging front I decided to take a break in making pictures of construction. I will keep posting because I like it for myself, keeping track and trying things that I otherwise wouldn't do, inspiring as the blogging community is. I'll keep it simple this summer, no tutorials, no during construction pictures. Most important of all: I'm going to try to relax by sewing again, I can use some time for myself.

Happy sewing to you all!

Wednesday, June 17, 2009

Next on the list

Feels like a long time ago I was sewing. It just isn't happening at the moment. My daughters top (which she was happily wearing last weekend) was just a small project of only a few hours all together.

Blog reading is the same: there are more than 200 new posts on my bloglist in google reader. Impossible to read them all and I feel overwhelmed. Perhaps I should click the "mark all as read" button and start again.

As more often I'm thinking of temporarily stopping with blogging, on the other hand, keeping track on my blog, gives me the feeling that I finish what I start, which has been different in the past. And it lets me think about my sewing and often start something which I otherwise would postpone or not do.

Like this top, I had only 1 meter of fabric and was searching for a summer top that could be made with only that length. Publishing my "to do" list made me actually search for the pattern, while otherwise it might well have been left for yet another year. Summers here are unpredictable and not very long. Till now I almost had no occasion to wear real summer clothes. In between seasons is far more useful.

This top (BWOF 06-2008-109) could be made out of just the meter of fabric when omitting the tie. It's cut, marked and interfaced where necessary. The next thing is to go sewing. Perhaps tomorrow.

Monday, June 8, 2009

Top for my daughter

Last week Lindsay T wrote about sewing for her daughter that her modus operandi is: "make it fast, make it easy". She's right, when the lifespan of a garment is one season, I don't make it very difficult either, certainly not on a summer top like this.

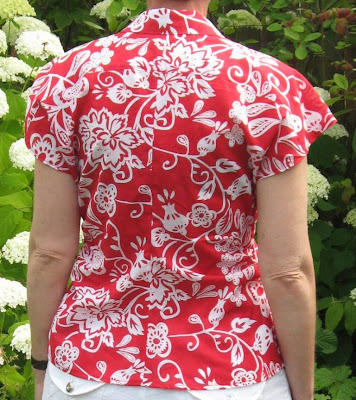
In the BWOF top I omitted the lining, there's no real need for it, and there are layers enough....

From the point that I wrote about yesterday, my next step was to measure the length of elastic needed on my daughter. Don't know if that's close to what BWOF gave as length, I go for what is wanted.

I sewed the elastic in the round, measured it in 4 equal pieces, did the same for the top of the dress and stitched the elastic to the wrong side of the top, in the seam allowance (DD cut this top, she's not cutting very straight lines yet, no problem really, as we mark actual stitching lines).

Before folding I trimmed the seam allowances at the turning point of the side seams.

Then I stitched with a zigzag at the top of the elastic (still at the wrong side). Then turned the elastic and stitched in the ditch at the side seams. The elastic is not visible from the inside.

That's all I did. In wearing this top it must become clear whether this is enough and the elastic stays in place and will not turn. I don't think it will, it's wide (the extra zigzag you see in the picture is because it's "maternity" elastic, the only wider elastic in the house, I used it sometimes in pants for my children when they were much younger). Inside it could be neater, but I'm not going to bother.

In the way I did this, there are far less layers at the seam than in the way BWOF described. In this case I don't understand the pattern makers.

BTW: Marita made it too for her daughter, and is going to write how she did this top and will probably have another take on this pattern. It's good to know that the problems with this top can be solved in more than one way.

Pictures on my daughter later I hope.

Sunday, June 7, 2009

Progress

I still wanted to thank you all for your kind comments on my pants. I'm so happy with them, and almost lost them yesterday! I was at a birthday party and someone pushed me accidentally, while I was holding a glass of red wine in my hand. And of course that went over my new pair of pants, leaving one leg full of stains! Very unfortunate, and I thought of that happening when I put it on. Weird. Immediately soaked the stains with water and salt as far as possible while wearing it, and put it in the washing machine at home after applying special stain remover. It worked, and nothing can be seen any more. I can tell you I was relieved.

On to the tunic for my daughter, that is not a project to be made by her after all. Too complicated. Thanks Summerset for your ideas, I took your advice and did some other things too to remove bulk. These are my steps so far (and for those of you who are on the point of making this one: I'm not finished yet, so I don't know the final result yet):

Instead of pressing the dart in the body part upwards, I cut it open, graded the seam and pressed it flat.
I cut one of the ruffle layers in two and made a small hem at the bottom. This way two layers are removed from the front.

So: you don't need to cut the pattern piece for this on the fold this way, and you don't need it twice in a double layer.

I sewed the first layer that is directly on the body part just beside the actual seam line in the seam allowances to baste it in place. At the top it is sewn just outside the seamline, at the body part. Then I cut away the seam allowance at the stitch line. This layer then doesn't need to be folded over the top. Result: after folding two layers less.
The upper layer is now pinned over the under layer. There are only two layers that need to be folded, instead of the original five.

I am thinking of applying elastic at the top in a variation of the anonymous comment given. Of course I"ll let you know how this top will be continued.

Friday, June 5, 2009

A tunic for my daughter

Tunica 113

Last week my daughter traced and cut the tunic pattern from the June BWOF issue, # 113. She's pretty much occupied with school and tests, and tonight I thought I'd help her a bit and gathered the front and pinned it together. And am surprised at the many layers I'm accumulating and the thickness of it all.

The top part is a pattern piece with darts, then the two layers on top with the gathers. Pinned together there are 5 seam allowances at the top, and they have to be turned and a (knit) lining must be added. Finally there is elastic at the top. When turning the top seam allowances, there will be 10 layers (lining nog counted), which is a lot of fabric!

I've only gathered the front now, but the back is about the same, only with one gathered layer. With the gathers a lot of fabric in the side seams.

Advice needed! The directions are clear enough, but could it be done differently? Or are we using the wrong fabric?

IMG_5497 Front with two gathered pieces

IMG_5498 All seam allowances at the top

IMG_5499 This is only the front side seam now.

Wednesday, June 3, 2009

Vogue pants + BWOF top

First a thank you for all your nice comments about the wrap top. I'm really happy with that one, and never realised there was a pattern for it at all. There's nothing to keep it in place, except for a knot sometimes in the fabric itself. And I'll let you know my favorite way of wearing it sometime.

Finally I've hemmed the pants, they took me quite a while to complete, which was partly due to the piping, partly due to lack of time to sew.  Here it is, together with BWOF #118 from the February issue. Both projects from my to do list I made earlier.

On the pants I omitted the belt loops. I already have my doubts about the waist tabs, perhaps there's too much going on. And a belt is not to be worn in any case with this design.

I lined it with white lining fabric, and cut the inner pocket from white cotton, to make sure the lines of the fabric wouldn't see through. Even with the white lining you can see the pockets through the fabric. But alas, that's often the case with white fabric.

The fabric is a very good quality linen, which originally was sold for over 20 euro/meter, and which I bought at a closing down sale for 5 euro/meter.

The top (sorry, the pictures are no clearer than this, black fabric!) is a nice variation on a t-shirt. The instructions in Dutch were as incrompehensible  as the English apparently, if I judge the reviews of this one. For me the review and order of construction Kay Y mentioned in her review, saved me from making a wadder. I'm absolutely sure that I wouldn't have found out how to do this. After reading the instructions in the magazine, I went to the computer to find Kay's review, which I knew had more information. I printed her instructions and took them to my sewing machine. Followed  this step by step, and it came together smoothly. So Kay, if you read this, THANK YOU.


A few more pictures to conclude. And the back... fabric behaving differently, sigh.